

How to build custom closet
When planning to build a custom closet, the most important step is to think through the design and layout of your desired custom closet space. This will involve taking inventory of what items you plan to store in the closet, the amount of space you have available, and any potential design elements you may want to include.
Having a clear idea of what you want your custom closet to look like will make the process of constructing it much easier.
Measure the space
Before you begin planning your custom closet, you must measure the space accurately. Measure both the vertical and horizontal dimensions (length and width). Note any plumbing pipes or walls that could limit the probability of building a closet. Also, measure all windows aren’t too close to your workspace as they can make it difficult to plan.
Once you have established the first step of measuring the total width and length, you can then select a design that accommodates what your space has to offer. If you plan on adding shelves or hanging rods to accommodate clothes and accessories, think about how many shelves or rods within that space would be ideal. Additionally, think about how much vertical room is needed for bulky items like large blankets and determine how many drawers or cabinets might be necessary within that space.
When measured correctly, these dimensions can help provide a strategy for building out the closet system in an effective way. With this information in hand, there are several customization options for designing a unique closet system that fits every need.
Choose the materials
One of the most important decisions you will make when planning your custom closet is to choose the materials wisely. The material you select will have a direct impact on the durability, longevity, and look of your custom closet. Types of materials include particle board, MDF boards, grade 1 plywood, solid wood, veneers, melamine board and painted board.
Each has its own specific characteristics that may make it more or less suited to your project.
- Particle board is a low-cost material and widely used in the construction industry for cabinetry and furniture. It is made up of small wood particles that are mixed with glue and pressed into sheets or panels. It is lightweight but not very durable making it prone to cracking or swelling if exposed to large amounts of moisture or humidity.
- MDF boards are similar to particle boards but much stronger due to their composition using very fine wood chips instead of coarse ones. MDF can be tempered for additional strength so there will be lesser chances of deformation due to changes in humidity levels or temperature fluctuations over time.
- Grade 1 plywood offers great stability because each layer follows a cross-grain pattern which helps reduce expansion and shrinkage caused by climate changes over time compared with other types of wood paneling such as solid wood panels or veneer products. Plywood tends to be more expensive than other types of materials but offers excellent strength and durability making it an ideal choice for custom closet projects that require precise measurements such as shelving units where slight variations in shape can cause issues down the line when trying to fit them into existing spaces within one’s home.
- Melamine board has become increasingly popular in recent years due its affordability, easy maintenance requirements with regards cleaning and its ability to hold screws better than many other types os surface materials such as laminates which chips away easily while drilling holes for screw placement during installation processes on custom closets projects. The biggest drawback when using melamine board is also its greatest benefit – it’s not waterproof which means it must be properly sealed against any sort water damage or seepage before installation begins on any custom closets project.
- Painted Board provides an incredibly versatile option; its matte surface accepts paint well which makes it ideal for covering up any existing scratches at pre-fixed price points lower than other surface coating options like lamination products; depending on space availability this type can provide a great solution by providing color coded organizational labeling outside while maintaining ample interior storage stability/capacity within.
Create a budget
Creating an accurate budget is the foundation of any successful custom closet project. Start by gathering a few quotes from different closet companies and taking into account the size, configuration and materials you’ll use in your project.
There are a few categories in which you should allocate your budget for your custom closet: Materials, Installations, and Design & Consultation Fees.
When it comes to materials, many do-it-yourselfers take advantage of ordering ready-to-assemble shelving systems from home improvement stores. However, pre-fabricated solutions may not be able to accommodate all of the features that you want for your space and tend to be more cost prohibitive than hiring a professional designer who can provide professional consulting on materials.
It’s important to also consider installation fees as well as the cost of labor for your project. While some closet companies may include installation fees as part of their price bundle (including factors such as time/travel expenses), others charge a per hour rate or needed services and equipment fees separately. If you opt to DIY, then make sure to factor in any tools or supplies needed in addition to any necessary permits that may be required by local building codes.
Lastly, don’t forget to consider design consultation costs when creating your budget! Most professional custom closet designers offer complimentary consultations at no additional cost which can help you save money while ensuring that you get exactly what you want out of your space – so it’s best practice take advantage of this service!
Preparing the Space
Before you start building your custom closet, it’s important to take the time to plan and prepare the space. This includes:
- Measuring the room and the closet area
- Assessing the lighting
- Making sure your tools and materials are ready
- Considering what type of storage you need
- Deciding what kind of materials will work best for your space
All these steps need to be taken before any actual building can begin.
Remove the existing closet
Before beginning the installation of a custom closet, it is important to remove the existing closet. Do this carefully and with caution. Any items stored in the closet should be removed, such as shoes, clothing, shelving units, and accessories.
Removing an existing closet will likely require the use of some tools, such as removal knobs or screws or prying/cutting tools depending on what materials are used in your current setup. You may also need to cut away excess fasteners and drywall clips that secure your drywall to the framing studs. Take care when doing so to minimize possible damage to your wall. Be sure any plumbing connections are properly disconnected from any water fixtures as these will need to be reattached once your new custom closet is installed.
To assist with removal of large items like shelving units or doors, having a second person can prove beneficial. If applicable, sliding doors may be able to remain temporarily in place until after building the new custom closet has been completed; however this largely depends on individual circumstances. Either way, manual safety precautions such as wearing safety glasses and gloves should still be taken during all stages of dismantling your existing closetspace components.
Prepare the walls
A custom closet provides a great way to maximize the storage space in your home, but it requires some preparation to ensure you’ll get the most out of it. To begin, you’ll need to take a look at the walls in your closets and identify any potential issues.
If there is any wallpaper on these walls, you’ll need to remove it beforehand. Painted walls will also need to be assessed for condition because imperfections that may be hidden by paint can cause serious problems after installation. If there is any existing molding that you plan on keeping, now is the time to make sure it’s in good shape.
You will also want to make sure that all of the flooring and drywall is secure. This includes checking all studs and brackets, as well as looking for signs of water damage or evidence of insect activity. You may find that some parts of your wall need repair before installation can begin—common issues include:
- swelling wood
- loose drywall (or other surfaces)
Once these repairs are complete, it’s time to start measuring!
Install the framing
Installing the framing for your closet system is an important step in the process. Once the product has been delivered, you can begin constructing your closet. The important thing to remember is that all panels, shelves, and rails should rest within the walls of the frame.
- Begin by measuring and marking where the studs are located on the inside wall of your closet space. This will guide which point you need to adhere each piece of framing.
- Pre-drill holes in accordance with manufacturer instructions and create a pilot hole for insertion of each screw or anchor bolt.
- Secure each joint connection securely based on manufacturer instructions, then check again to make sure each connection is secure before moving on to next step.
- Once completed, confirm all measurements for accuracy before mounting additional support pieces for stability and hanging rods or shelving.
Building the Closet
Building a custom closet is a great way to make better use of available space and provide storage for all of your clothes and accessories. It can also improve your home’s appearance and make for a more organized and comfortable living space.
In this article, we will go over the steps for how to build a custom closet, from designing and planning to installing the shelves and drawers:
Install the shelves
Installing shelves in a custom closet is an important step for maximizing your storage space. With just a few simple tools, you can easily create custom shelving that will suit your needs and look great in your new closet.
Before you start, measure the width and depth of the wall space where the shelf will go, as well as the height of the ceiling. This will give you an idea of how much shelf material you need and where to place it. You should also measure any obstacles such as outlets or light switches that will interfere with your shelving installation.
Once you have all this information, you can decide on the type of shelf material that works best in your space. Common materials include particle board, plywood, or melamine-covered boards (often used for laminate countertops). All these materials should be cut to size with a saw before being placed in the closet. Shelves may also need additional reinforcement which usually consists of metal brackets attached to the wall studs or ledges installed into preexisting walls. Be sure to use heavy duty screws and anchors for extra strength when attaching shelves to walls!
Finally, it’s important to finish off your shelves with trim such as molding or corner blocks for aesthetics and more stability when weight is added onto them. With these tips on building custom shelves in mind, creating functional shelving in any closet should be easy!
Hang the rods
Now that you have the walls of your closet prepped, it’s time to hang the rods. Depending on the size and configuration of your closet, this could include a single rod for hanging clothes, multiple rods for double-hanging items, shelves for folded items and even poles for shoes or other belongings.
For most closets, you will need one main horizontal wardrobe bar to hang clothing hangers from. This bar is best installed at just below chest height. If you prefer to double-hang clothes on two levels, you can use two separate hanging bars installed at different heights. For items like overcoats and long dresses, install a taller rod at least two feet above the top of your doors.
If shelving is specified in your design or needed for additional storage space, mount them in between each space in which the wardrobe bars are located. Floorshelves or additional box shelves can also be added under the longest (bottom) rod in order to give you more storage options.
Finally, if planning to add meters worth of clothing rack space is important to you, consider adding poles specifically designed to store shoes or accessories like ties and scarves alongside railings where these items will be hung.
Add the drawers and doors
When the frame of your custom closet is built, you can begin to add the drawers and doors. Before purchasing any items, measure the space for each item and ensure that your measurements work with the available space. Make sure that all purchases match the size and style of your frame.
Drawers and doors will provide additional storage for objects like clothing, accessories and shoes. There are various types of drawers such as simple plastic inserts or more traditional style drawers made of wood. The type you select should depend on what you plan to store in them. Likewise, there are a wide array of doors available to match any design aesthetic – from simple bi-folds to more intricate sliding door options with architectural accents.
When installing drawers and doors, be sure to use appropriate hardware that supports the weight of these items securely. Take into account how often they will be used when selecting hardware so they are sure to stay in place when opening/closing over time. Test out each finished part before placing any items inside – double check that all components fit securely into place before use!

Finishing Touches
Once you have all of the major components of your custom closet installed it can be easy to think that you are done and ready to start using it. However, there are a few last details that can really make your custom closet look and function better.
In this section, we will talk about the finishing touches you should apply to your custom closet before using it:
Add the trim
After the shelving and rods have been installed, you can add the trim pieces to give the closet an attractive finished look. Baseboard molding along the floor and ceiling creates a neat boundary, while balusters and rosettes provide extra detail on the shelves, panels and columns.
Shoe shelves are another great way to customize your closet. The ideal way to store shoes is by standing them upright, so custom-designed cupboards or shallow drawers can be a great addition. Garage hardware such as silver racks or handbag holders may also be used to make storage easier.
To create storage space near the ceiling of your closet, add additional tracks and hang vertical component organizers like baskets that can hold sweaters or hats. Last but not least, don’t forget about lighting – this will help improve visibility within your space as well as adding some important visuals of your closet design! Adding LED lighting strips behind toe-kicks is especially recommended for closets with no natural light source.
Install the hardware
Installing the closet hardware is one of the finishing touches to constructing your custom closet. Different pieces of hardware must be installed, including handles, hinges, rollers, and tracks.
- Handles: A variety of different door handles can be used in a closet system. These come in several variations and styles such as matte black steel or chrome-plated brass. The right handle should match the overall aesthetic of the space.
- Hinges: Hinges are necessary components that keep your doors in place and function properly. Concealed hinges are most often used for closet doors as they provide a cleaner look on the outside.
- Rollers: Rollers are often found at the bottom of sliding closet doors, making them easier to open and close with minimal effort required from you. Roller styles come in both plastic and metal versions, depending on what type of door you have installed in your closets.
- Tracks: Tracks provide additional support for your sliding closet doors by providing a smooth surface for your rollers to travel along without getting caught or sticking on anything else in the surrounding area. Aluminum tracks tend to be most commonly used because they’re easier to install compared to other materials such as stainless steel or wood materials which may require more precision during installation in order to ensure proper alignment when all pieces are connected together correctly – ultimately ensuring smooth operation when you open and close your sliding closet door.
Paint or stain the closet
When it comes to finishing the custom closet you just built, your choices are either paint or stain. Both options will give your closet a sleek, finished look and seal the wood from the elements.
Paint provides a variety of color options and can be applied in multiple coats for a long-lasting finish that is easy to clean and provides maximum protection. Additionally, primer can be used before painting to give the wood an even smoother surface.
Staining wood allows you to bring out its natural beauty while still providing protection against common household wear and tear. Wood stains come in many different shades, but they are all designed to give a subtle hint of color rather than completely masking the grain of the wood. Additionally, staining won’t chip or flake over time like paint sometimes can, so if you want an aging finish with greater longevity, choosing a stain may be your best option.
No matter which color scheme you choose for your custom closet design, applying paint or stain is an important step in completing its overall look!
Final Steps
Completing the custom closet you are building is the final step in your journey towards improved storage and organization. It is essential that this step is done correctly in order to achieve your desired results.
In this section, we will discuss the different details to consider when finishing the project. From installing the finishing touches to getting the closet ready for use, each step should be done with precision and care.
- Installing the finishing touches
- Getting the closet ready for use
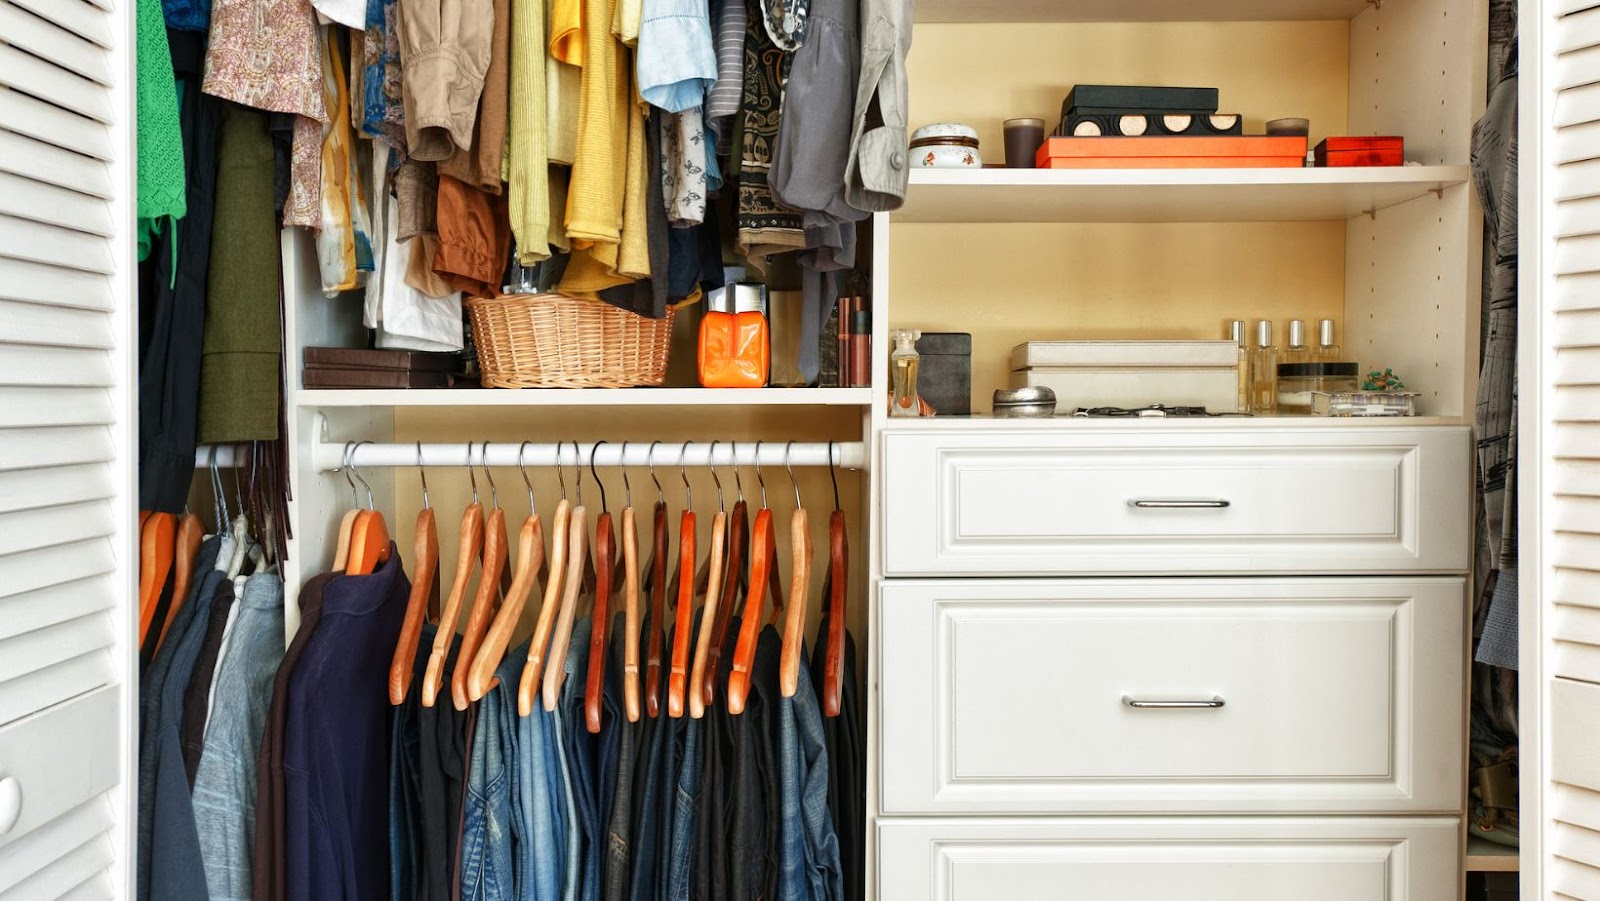
Place the items in the closet
Now that you have completed building your custom closet, it’s time to place the items inside. Here are some tips for getting organized:
- Start by grouping items by type. For example, hang all of your coats, jackets, and blazers together on hangers. Arrange pants and skirts on slick hangers designed to keep clothes from slipping off onto the floor.
- Separate items that should not touch each other into distinct sections within the closet; for example, place less-used items at the top and make room for your everyday clothes at eye level or below.
- Utilize your available storage space wisely; use shelves or drawers for hats and purses, attach hooks on the back of doors to hang ties knee-high or above on recessed shoe shelves.
- Store bulky out-of-season clothing in vacuum sealed bags so they take up less space in your closet; tape a note to the outside so you know what’s in it when you go looking for something specific later!
- Pack folded items together neatly; maximize drawer space by folding sweaters individually before stacking them neatly with similar fabrics like cashmere or wool..
- Once everything is organized and tucked away, complete the look with a decorative set of closet organizers for bags, jewelry and other accessories!
Add lighting
Once the closet is completely installed and the shelves are in place and neatly organized, the last step is to add lighting. There are several types of lighting that can be used in a custom closet, all of which can be found at most home improvement stores. LED lighting has become increasingly popular due to its durability and low energy consumption. Another option is fluorescent lighting, which can provide bright overhead light similar to traditional office or commercial spaces. Both options usually require a licensed electrician for installation.
For additional flexibility, glass linear shelves with integrated LED undershelf lighting will produce an evenly lit interior while also providing an attractive display area that reflects light and makes the walls look brighter. Motion-sensor nightlights in closets can add convenience and safety, especially for households with young children who may be roused from sleep during nighttime wardrobe changes. Recessed track lighting systems offer directional spotlights for objects on shelves that require more illumination than ambient light sources provide. Finally, if you have unused space such as under cabinets or above shelves, consider installing plug-in low voltage puck lights to softly illuminate them without taking up much room or conflicting with other fixtures.
Enjoy your custom closet!
Congratulations, you now have a beautiful custom closet that is perfect for organizing and displaying your belongings. Before you enjoy all the uses and benefits of your new storage space, there are just a few final steps to complete:
- Remove all dust, dirt, and debris with a soft cloth or brush vacuum attachment to ensure your custom closet looks nice and neat.
- Properly organize all your items in their designated areas.
- Make sure to keep your custom closet clean by regularly dusting all surfaces with a lint-free cloth.
By taking the time to complete these crucial final steps after installing your custom closet, you can ensure that it will remain both tidy and organized for years to come!
More Stories
Essential Tips for Purchasing the Perfect Sofa
Essential Tips for Hiring the Right Construction Company
Common Plumbing Issues and Practical Pro Tips on Solving Them