

How to install closet shelves
Installing shelves in your closet can be a great way to maximize your storage space. Before you begin the process, you need to make sure you have the right materials. From lumber to screws and wall anchors, there are a few things you will need to have on hand in order to successfully install your closet shelves.
In this section, we will look at all the materials you will need for the job:
- Lumber
- Screws
- Wall anchors
Measure the closet space
Before installing closet shelves, it is important to accurately measure the space you have available. Measure from wall-to-wall, from the ceiling down to where you’d like your shelf or shelves to end, and any other dimensions (i.e., depth) that will be needed for a correct fit. You must also factor in any existing fixtures or obstructions that may be present in the closet such as windows and doors. Make sure you have enough clearance so that these obstacles are not interfered with by your shelving installation.
Once you’ve taken all of the necessary measurements, it’s time to select your shelf materials and hardware.
Purchase the appropriate shelves and brackets
Correctly installing closet shelves and brackets is essential to ensuring the safety and stability of your closet storage system. Knowing what materials to purchase can be a daunting task, but it is important to make sure that you buy shelves and brackets that will support the items you intend to store in the closet.
The type of shelf or bracket system you choose will depend on your individual needs, but the most popular types are typically constructed from steel, plastic, or wood. Wood shelving is generally simpler to install, but it isn’t as strong as steel or plastic systems. Plastic shelving tends to be more cost effective than metal systems, while offering comparable strength, durability, and stability. Closet systems made from steel are often preferred for maximum weight carrying capacity and sturdiness.
Be sure to consider size requirements when purchasing your materials as well; it is helpful to choose shelves and brackets with adjustable widths that can accommodate various closet configurations and items of varying sizes. It is also important to ensure that the products you purchase will be compatible with each other; not all shelf hardware works together, so read labels carefully before making a final decision.
Preparation
Getting the closet ready for shelves requires careful planning and preparation. The first step is to measure the closet to determine what size and type of shelves will fit. Next, you’ll need to gather the supplies and tools necessary for installation. These include a stud finder, drill, screws, level, tape measure, and the shelf bracket and shelf of your choosing.
Let’s walk through the installation make sure your shelves fit and work perfectly in your closet:
Remove any existing shelves and brackets
Before getting started on installing new shelves, begin by removing any existing shelves and brackets from the closet. To completely clear the space, keep in mind that any other items stored on these shelves (like boxers or books) also need to be taken out.
Thoroughly clean and prepare the area for installation. This may include sweeping away any dust or dirt, patching any imperfections in the walls, or removing old paint or coats to ensure that everything is level before installing the new shelving.
Gather all your tools and materials before starting any work so you know you have all of what you need to get the job done correctly and efficiently:
- Existing shelves and brackets
- Items stored on shelves
- Cleaning supplies
- Tools
- Materials
Clean the closet space
Before you begin installing your closet shelves, it is important to first clean the closet space. Removing any existing items and vacuum or sweep out dirt and dust will help ensure the shelving you install will last.
You should also make sure to inspect the walls, ceiling, floor and door frame for any irregularities or damage such as cracked wallboards, loose nails or uneven surfaces. If necessary, perform any repairs or adjustments before proceeding with installation.
Additionally, note that installing shelves along a single wall may not be possible if it is an exterior wall with insulation, as insulation tends to reduce shelf height and stability.
Installation
Installing shelves in your closet is a great way to create more storage and organization. With the right tools, some planning, and a few hours of work, you can easily install new shelves to your closet. This article will cover the basic steps for installing shelves and provide helpful tips to ensure the job is done correctly.
Mark the wall for the shelf brackets
Before you can attach shelf brackets, the first step is to mark the wall where the brackets will be mounted. Most closet systems recommend using a 3/16 inch masonry bit, a drill and a chalk line to mark the wall. To start, draw two parallel lines along two walls of the closet approximately 32 inches apart to ensure bracket stability.
Securely fasten one end of your chalk line to the bottom corner of one end wall with a small tack hammer. Stretch the chalk line along your drawn parallel lines and release it at the other corner to draw a reference line between them. Once you’ve snapped your reference line, measure up from it 32 inches and use your masonry bit to firmly drill holes into each wall for mounting screws or anchors for bracket supports.
After that, it’s time for installing your shelves by screwing or anchoring in place along these measurements or according to manufacturer instructions. Be sure that when anchoring into drywall surfaces that you use appropriate anchors such as toggle bolts as per directions. If mounting on wood block walls make sure you screw in directly—do not use anchors. When finished all foundation preparation work, double-check all measurements before proceeding further with construction of shelves and attachments components into walls cavity based on manufacturers’ instructions for best results and safety consequence concerns.
Use an electric drill to secure the brackets to the wall
Using an electric drill is the easiest way to ensure that the closet shelf brackets are securely attached to the wall. Begin by measuring from the top of each shelf to the desired height, then mark those locations with a pencil. Make sure that you hold a level up against the wall to make sure all brackets end up evenly spaced apart and level.
Once you have marked each location, you can use an electric drill with an appropriate screw bit and screws to secure each bracket in place. When using a drill, it is important to be precise so that you do not accidentally damage your walls or other materials. Make sure all screws are tightened securely prior to placing any items on the shelf areas.
Place the shelves onto the brackets
Before installing the shelves, it is important to make sure that the shelves are the correct size for your closet space. After measuring and finding the correct size, place the brackets onto a flat surface.
The next step is to place the shelves onto the brackets. Begin by lining up on end of each shelf with a bracket’s edge and then fit them over both brackets with both shelf sides overlapping each bracket side.
Then, gently wiggle or rock each shelf back and forth until it sits evenly between the two brackets on both sides. You can also use a leveler to check that your shelf is perfectly straight while you are adjusting it. When finished securely fasten each shelf into place with screws, which should be included in your closet shelving kit.
Once complete, move onto installing any additional accessories like rod supports or wall covers as noted in your closet shelving instructions prior to hanging all of your items on closed shelves.
Finishing Touches
Although you have got the majority of your closet shelves installed, there are still some finishing touches that you will need to add before they are good to go. Here, we will look at the last steps of the process when it comes to installing closet shelves.
From making sure your shelving is level, to adding accessories, there are few final steps you will need to complete:
- Check that your shelves are level.
- Add shelf supports if needed.
- Secure the shelves to the wall.
- Add any accessories such as hooks, baskets, and dividers.
- Check that everything is secure and stable.

Add decorative shelf supports
In addition to the main shelving, you may want to add decorative shelf supports. This can give your closet a more finished look, and provide a place to attach cabinet knobs or other decorative items.
Many modern shelf supports use small plastic tubes that fit into the pre-drilled holes in the shelf boards. If you’re installing many shelves at once, this is an especially convenient choice because it involves just one tool (a cordless drill/driver) and no measuring.
If you prefer an antique look or if you’re assembling just one or two shelves, there are also a variety of metal shelf supports available in different sizes and designs. You can choose from various designs such as:
- Angles bracket-type supports
- L-shaped brackets for added strength
- Traditional turned posts for added elegance
- Ornamental grilles for effortless panache
For some of these furnishing options, small screws are used to attach them to the shelf boards after drilling their respective pilot holes. Depending on your design preference, closet shelves can be complimented with decorative hardware of your choice that increases overall aesthetic appeal and functionality of your new closet space.
Add shelf liners or shelf paper
Once you have installed your closet shelving units and positioned the shelves, it’s a good idea to add a layer of protection to the surfaces. Closet shelf liners provide an attractive and protective solution for both wire and wooden shelving. Liners prevent items from sliding off shelves due to their friction-type finish and are even better at decreasing dust build-up than plain shelf paper does.
Generally, liners come in rolls that measure 25 inches wide x 15 feet long and most can be cut to fit your desired length with scissors. Some styles have adhesive backing that permanently adheres the liner to the surface of the shelf for added security. These type liners are water-resistant and durable; however, they aren’t recommended for use on glossy surfaces such as painted walls or melamine closet shelving because they may leave a residue behind when removed.
An alternative option is using traditional flat shelving paper as opposed to liners with cushiony padding since they can be used on any surface without leaving residue when removed. Although not as thick or waterproof as close shelf liners, you can layer several sheets of heavy gift wrap over regular paper if desired or install several layers of light-weight contact paper instead.
Whether you decide to use liner or paper, it’s a good idea to change out the materials periodically (or less frequently) depending on how often you use the shelves. Doing so will keep your closets neat and presentable overtime; plus reduce replacement costs in the long run!
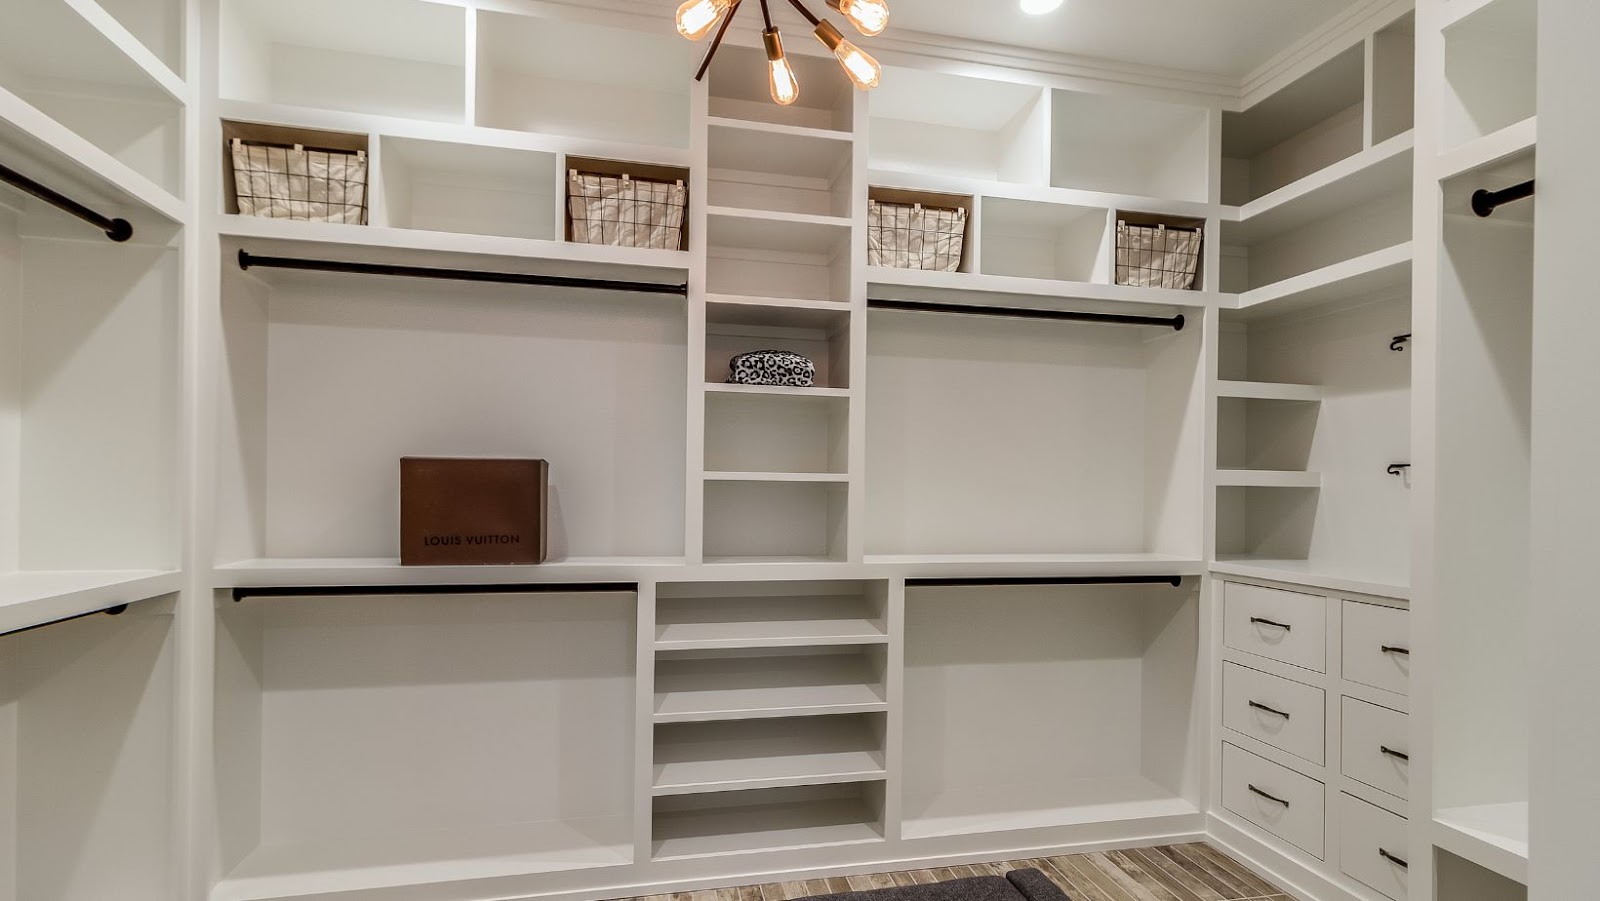
Add any other accessories, such as baskets or hooks
After installing the closet shelving, you may want to consider adding any additional accessories that will help you organize your belongings. Storage baskets can help keep items such as socks and gloves organized in drawers, or offer quick storage for frequently-used items like hats, scarves and jewelry. Hooks can add secure storage for your favorite nightgown or robe, and wall-mounted shelves are ideal for displaying framed photos or mementos. If your closet is deep enough, consider a built-in bench seat that provides extra seating and provides another spot for storing excess clothing during seasonal changes. Finally, ensure your closet has ample lighting to make finding what you need easy!
More Stories
Home Care Agency Services: Beyond Personal Care
Add Some Personality into Your Home with Creative Designs
Types of Fire Alarms: Selecting the Ideal Solution for Your Safety